The Save Dialog
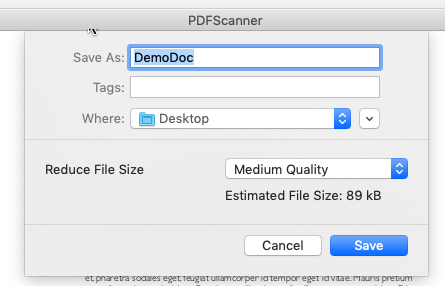
Clicking either "Save Selection" for only saving the currectly selected set of pages or "Save" to save all pages to one file will display the default macOS save dialog. In the above screenshot, you see the simplified view that only allows access to commnoly used folders. Click the little arrow icon on the right hand side of the "Where" field to show the full folder selection view.
The save dialog allows for reducing the file size by compressing the scanned image inside the PDF file. This is currently only supported for grayscale and color images because monchrome scans already are quite small.
The following quality settings are supported:
- Don‘t reduce: Will keep the images uncompressed. For scanned documents, this produces the largest file, but it may be the best setting for imported PDF files.
- Very Low Quality: Resolution reduced to max. 75 DPI, very high compression
- Low Quality: Resolution reduced to max. 150 DPI, high compression
- Medium Quality: Resolution reduced to max. 300 DPI, high compression
- High Quality: Resolution reduced to max. 300 DPI, medium compression
- Very High Quality: Resolution reduced to max. 600 DPI, low compression
The quality settings reduce the resolution because OCR works best on higher resolution images (300 DPI upwards), but for reading or printing the file often smaller resolutions are sufficient.
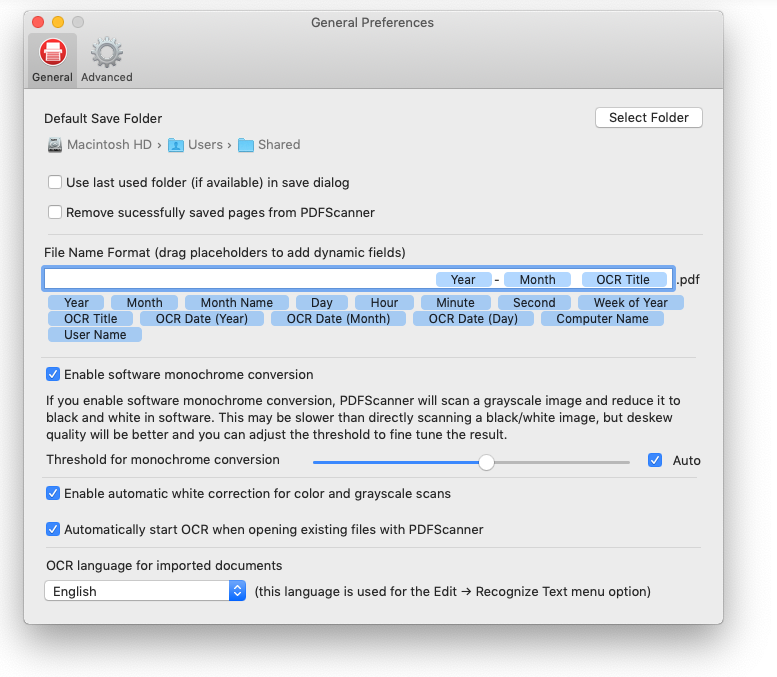
Save Preferences
You can set a default file name format in the preferences. This allows to define placeholders that will be filled by PDFScanner when saving the document. Just drag the placeholder tokens to the default file name field and add custom text where needed.
There's also an option to specify a default save folder that will always be opened in the save dialog.
When saving, PDFScanner will automatically append a sequence number if a file with the same name is detected in the current directory.