Scanning
Scanning with the camera
The document camera on iPhone and iPad, dewarp, and tips for clean captures.
The camera as a scanner
On iPhone and iPad, the built-in document camera appears in the device picker like any other scanner — as iPhone Camera or iPad Camera, marked This device. Select it, tap Scan, and Apple’s document camera opens: it finds page edges automatically, captures when the page is steady, and lets you photograph as many pages as you like in one session. When you finish, the pages land in the workspace exactly like scanner pages, ready for cleanup and saving.
The first camera scan triggers the system camera permission — Neo uses the camera only to scan documents.
Camera scan options
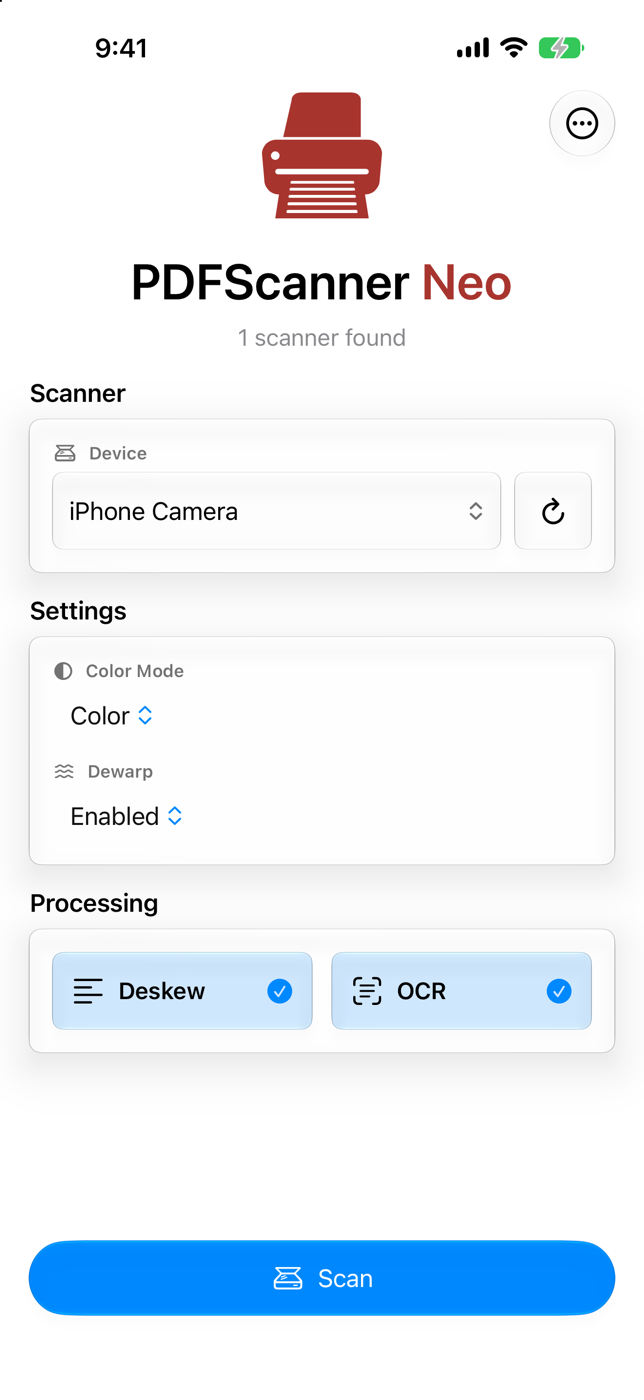
With the camera selected, scanner-only settings (source, page size, orientation, resolution) disappear and you get:
- Color Mode
- Color, Grayscale or Black and White. Grayscale and black-and-white are applied as post-processing after capture — the small (post processing) hint reminds you of that. Color (Clear Background) is not offered for camera scans.
- Dewarp
- Corrects the perspective distortion that comes from photographing a page at an angle, so the page looks flat and rectangular. Enabled by default; disable it if you photograph something that should stay exactly as framed. Free for everyone.
- Deskew Pro and OCR Pro
- The same processing toggles as for hardware scanners — straightening and searchable text. See OCR and searchable PDFs.
Tips for clean captures
- Place the page on a contrasting background — a white letter on a dark table is easy to detect, white on white is not.
- Prefer even, indirect light. Avoid your own shadow falling across the page.
- Hold the device parallel to the page. Dewarp corrects a lot, but less distortion in means better quality out.
- For multi-page documents, keep the camera session open and capture all pages in one go — they arrive in order.
- For text-only documents, switch the color mode to Black and White for dramatically smaller PDFs.